
Showing posts with label Tutorials. Show all posts
Showing posts with label Tutorials. Show all posts
0
Ravva Vamsi

Different Search Engines(Google, Bing..etc) uses a variety of methods to determine which pages are displayed first in the results. But any of them doesn’t reveal exact formula at it is a secret, but there are a few things you can do to improve your positioning in search results of Google / bing…etc. The term for this is Search Engine Optimization (SEO).
1. Title :
Page Title is most important thing for search engines to consider your page. keep titles with general usage words as users type in search engine with general words not with high level words. in short Be Simple in writing titles and make sure that your title impressive too as its also attract more users to read your articles.
2. Keywords :
Add Appropriate multiple keywords related to subject , try using Google Keyword Planner Tool, to find google keywords to estimate better traffic from google. Rather than focusing on a single word, try adding a few words to make a keyword phrase. you may have to watch about keywords phrase search (Trick #7, at 4m 5Sec ) work in .... read more @ http://goo.gl/DmAue0
How to Improve Your Website Ranking in Google
Move Your Website Up on the List of Search Engines by our 7 Simple ways to Improve Your Websites Ranking in Google / Search Engines Article
Different Search Engines(Google, Bing..etc) uses a variety of methods to determine which pages are displayed first in the results. But any of them doesn’t reveal exact formula at it is a secret, but there are a few things you can do to improve your positioning in search results of Google / bing…etc. The term for this is Search Engine Optimization (SEO).
1. Title :
Page Title is most important thing for search engines to consider your page. keep titles with general usage words as users type in search engine with general words not with high level words. in short Be Simple in writing titles and make sure that your title impressive too as its also attract more users to read your articles.
2. Keywords :
Add Appropriate multiple keywords related to subject , try using Google Keyword Planner Tool, to find google keywords to estimate better traffic from google. Rather than focusing on a single word, try adding a few words to make a keyword phrase. you may have to watch about keywords phrase search (Trick #7, at 4m 5Sec ) work in .... read more @ http://goo.gl/DmAue0
1
Anonymous
1. Always Clean Your Desktop

Always try to clean your Desktop files, try to put those files in the “My Documents” folder. If there are so many files with big size, you can put them in separate folders on your drives. Create shortcuts on your Desktop for the folders or files you frequently use. This method will help you to free up the memory for your PC and also reduce the time and frequency the hard drive is used and improve the response of your computer to programs you open and things you do. With this simple and easy method you will make your computer run faster.
2. Fix Windows Systems Files

We recommend this method to use this will help you to fix your windows system files. A Windows PC has lots of system file that perform different functions. Some time some of these system files has changed or become corrupted and that’s the cause of slows windows pc. If this happens to your windows PC, the speed of your system may decrease. By using the utility “System File Checking”, it will scan these files and fix any problem it finds.
How to use System File Checker, follow these steps:
1. Close all open programs on your Desktop
2. Click on the Start button
3. Click Run
4. Type this command in the Run box: SFC /SCANNOW
5. Click the “OK” button
3. Scan for Viruses, Spyware and Adware threats

Every Windows computer is vulnerable to viruses. Viruses are the major factor of your windows PC slow performance. All these Spyware and Adware are programs created by companies to find out more information about customers, so they can better market products to them. All these spyware and adware can load into computer memory and slow down your PC. Here are 10 Best Anti Virus Programs of 2012 and Top Free Windows Antivirus and 10 best Free Online Virus Scanners which will help you to scan your PC.
4. Uninstall Unused Programs

Whenever you install a new program in your PC, it creates connections between the program and the operating system. But most of the time you didn,t some of the programmes which are installed on your PC, they can slow down your system. So always try to uninstall unused programs, removing unused programs will free up space on your computer and may speed up your system’s performance.
5. Adjust Visual Effects for Better Performance
Windows provides a lots of interesting visual effects including animated windows and fading menus for operating system. If you do not have enough operating memory or facing memory problems, than these visual effects can slow down your computer. Adjusting or reducing visual effects can make a difference.
6. Defrag Your Computer

7. Don’t Automatically Start Programs
Unnecessary programs running on windows startup is the major factor of Slow PC. With the helps of this article we will show you how to determine what programs run when Windows boots, so you can choose which ones to remove from start ups programs. All these programs uses your system resources (operating memory), so any program not running will reduce memory use and may speed up your PC. Try the following step to stop automatically start programs
Open the System Configuration Utility:
1. Click on the Start menu, then click on “Run”
2. Type “msconfig” into the textbox and click OK (The System Configuration Utility will open).
3. Click the Startup tab (to see the list of items that automatically load with Windows).
4. Uncheck the box next to the program name you do not want to start with Windows.
5. Close this program and restart your computer.
Try these Simple tips and Speed up your Computer.
7 Ways to Speed Up Your Computer
Facing problem with your windows PC performance time to time. There are so many ways which helps you to Speed up your computer. Slow windows PC take more time to respond to a user’s actions like opening files, surfing internet, copying or moving files and other important tasks. Today we will show you some of the best tips which helps you to can improve your computer’s performance. Do try these steps in a order to speed up your computer performance.

How to Speed up Your Computer1. Always Clean Your Desktop
2. Fix Windows Systems Files

We recommend this method to use this will help you to fix your windows system files. A Windows PC has lots of system file that perform different functions. Some time some of these system files has changed or become corrupted and that’s the cause of slows windows pc. If this happens to your windows PC, the speed of your system may decrease. By using the utility “System File Checking”, it will scan these files and fix any problem it finds.
How to use System File Checker, follow these steps:
1. Close all open programs on your Desktop
2. Click on the Start button
3. Click Run
4. Type this command in the Run box: SFC /SCANNOW
5. Click the “OK” button
4. Uninstall Unused Programs
Windows provides a lots of interesting visual effects including animated windows and fading menus for operating system. If you do not have enough operating memory or facing memory problems, than these visual effects can slow down your computer. Adjusting or reducing visual effects can make a difference.
6. Defrag Your Computer
Unnecessary programs running on windows startup is the major factor of Slow PC. With the helps of this article we will show you how to determine what programs run when Windows boots, so you can choose which ones to remove from start ups programs. All these programs uses your system resources (operating memory), so any program not running will reduce memory use and may speed up your PC. Try the following step to stop automatically start programs
Open the System Configuration Utility:
1. Click on the Start menu, then click on “Run”
2. Type “msconfig” into the textbox and click OK (The System Configuration Utility will open).
3. Click the Startup tab (to see the list of items that automatically load with Windows).
4. Uncheck the box next to the program name you do not want to start with Windows.
5. Close this program and restart your computer.
Try these Simple tips and Speed up your Computer.
0
Ravva Vamsi
How to automatically update third-party software in Windows
Automatic Windows updates are fantastic, but they do help us forget to keep our other software up-to-date. FileREX automatically scans your computer for thousands of programs and tells you if they need an update.
4. Click the gear-shaped Options icon to run FileREX when you start Windows and change other options.
5. That's it! FileREX isn't quite as seamless as Windows Update, but it does make it incredibly simple to keep your software up-to-date.
Windows Update makes it dead simple to keep your basic system up-to-date, but this can lead to laziness or forgetfulness when it comes to other software.
Many popular programs, like Web browsers, check themselves pretty often, but others may not do so or may need to be told to do so. FileREX is a small, free program that checks your system for software that needs updating.
- Download and install FileREX.
- It should run automatically when you complete the installation and let you know if you've got any programs that need updates. Click the pop-up bubble or double-click the orange arrow icon in your system tray to bring up the main program window.
 |
| Step 2: Update notification. |
3. From here you can see what needs updating and go to the FileREX site to download and install updates.
 |
| Step 3: Update software. |
 |
| Step 4: Select options. |
Source:- Cnet.com
2
Ravva Vamsi
How to Recover Data From Crashed Hard Drive
Computer Hard Drive Crashed, this may happens to anyone. But what if you have lots of important data on that drive that you want to recover it. Don,t worry you can do it with easy way. For this you need a free app Recuva and external housing for Hard Drive to turn a formerly internal hard drive into an external one, so you can use it into any USB port.

Now you are ready to recover all your from crashed computer hard drive. Now connect the Hard Drive to your PC, launch Recuva and pointed it at the drive.
Now select the type of file that you want to recover from the Hard Drive.

Now it will ask you to select the location from where you want to recover the files.

Now you are ready to recover the files from Hard Drive. Now Click Begin Scan and wait for sometime.

Once the scan is complete, Recuva will list the recoverable files. Now select the files that you want to Recover.

That’s it now just browse the files that you recover with this freeware app Recuva
Download Recuva from Official Site : Click Here

Now you are ready to recover all your from crashed computer hard drive. Now connect the Hard Drive to your PC, launch Recuva and pointed it at the drive.
Now select the type of file that you want to recover from the Hard Drive.


Now you are ready to recover the files from Hard Drive. Now Click Begin Scan and wait for sometime.


Download Recuva from Official Site : Click Here
2
Ravva Vamsi
 If you are using Mozilla Firefox, Google Chrome or Opera as browser then, there’s a solution to get your Facebook old chat system back.
You just need to install ‘Sidebar Disabler’ extension on your browser. With this extension you can disable the newly introduced Chat Sidebar and return to the old Facebook Chat. Enjoy!
This guide is very simple, just basically involves downloading and installing an app.
Lets start off with google chrome:
Navigate to the the chrome addon site
Facebook Chat Sidebar Disabler For Chrome
Click install and your done, you dont have to like that facebook page that pops up but it helps the creator.
Next for Firefox navigate to
Facebook Chat Sidebar Disabler For Firefox
Install, let it do its thing than restart Firefox and your good :)
For Opera same thing, navigate to
Facebook Chat Sidebar Disabler For Opera
As of now there is no way to get the old chat back on internet explorer, when there is i will update this thread but for the mean time you will have to use one of the three browers.
Leave your feedback and a Thanks is appreciated.
Tips:
-Make sure your browser is up-to-date.
-Restart your browser after installing the script
-Download the scripts for Firefox from Firefox itself, not from any other browser. Same for Chrome.
-Not working? Try un-installing the script and then installing it again.
-Make sure you do not have more than 1 copies of the same script installed in your browser, as it may cause conflicts. Always remove previously installed script before re-installing it.
How to get the old Facebook Chat back on Firefox, Opera and Chrome
Facebook Sidebar Disabler

You just need to install ‘Sidebar Disabler’ extension on your browser. With this extension you can disable the newly introduced Chat Sidebar and return to the old Facebook Chat. Enjoy!
This guide is very simple, just basically involves downloading and installing an app.
Lets start off with google chrome:
Navigate to the the chrome addon site
Facebook Chat Sidebar Disabler For Chrome
Click install and your done, you dont have to like that facebook page that pops up but it helps the creator.
Next for Firefox navigate to
Facebook Chat Sidebar Disabler For Firefox
Install, let it do its thing than restart Firefox and your good :)
For Opera same thing, navigate to
Facebook Chat Sidebar Disabler For Opera
As of now there is no way to get the old chat back on internet explorer, when there is i will update this thread but for the mean time you will have to use one of the three browers.
Leave your feedback and a Thanks is appreciated.
Tips:
-Make sure your browser is up-to-date.
-Restart your browser after installing the script
-Download the scripts for Firefox from Firefox itself, not from any other browser. Same for Chrome.
-Not working? Try un-installing the script and then installing it again.
-Make sure you do not have more than 1 copies of the same script installed in your browser, as it may cause conflicts. Always remove previously installed script before re-installing it.
0
Ravva Vamsi
Proper Shutdown by Enabling Auto End Task
Auto End Tasks to Enable a Proper Shutdown
This reg file automatically ends tasks and timeouts that prevent programs from shutting down and clears the Paging File on Exit.
1. Copy the following (everything in the box) into notepad.
Quote:
Windows Registry Editor Version 5.00
[HKEY_LOCAL_MACHINE\SYSTEM\CurrentControlSet\Control\Session Manager\Memory Management]
"ClearPageFileAtShutdown"=dword:00000001
[HKEY_USERS\.DEFAULT\Control Panel\Desktop]
"AutoEndTasks"="1"
[HKEY_LOCAL_MACHINE\SYSTEM\CurrentControlSet\Control]
"WaitToKillServiceTimeout"="1000"
2. Save the file as shutdown.reg
3. Double click the file to import into your registry.
NOTE:-If your anti-virus software warns you of a "malicious" script, this is normal if you have "Script Safe" or similar technology enabled.
0
Ravva Vamsi

Top hidden
These are some uncommon but very useful tips tricks & hacks for windows vista to enhance the user experience in windows vista.
Enable Auto-Logon in Windows Vista (Warning: Security Risk)
a) click Start and type ‘netplwiz’ or click that name on the Start menu
b) in the GUI window that comes up, uncheck the “Users must enter a username and password to use this computer” box
c) click ‘Apply’
d) in the new dialog box that opens type the name of the account you want to auto-logon by default (if the account is not normally passworded then it blank)
e) click OK and exit.
Remove ToolTips From Showing When You Mouse Over Something
a) start > run = “regedit”
b) HKEY_CURRENT_USER > Software > Microsoft > Windows > CurrentVersion > Explorer > Advanced
c) set “ShowInfoTip”=dword:00000000
d) exit and reboot
Remove Splash Screen in Windows Mail
a) start > run = “regedit”
b) HKEY_CURRENT_USER > Software > Microsoft > Windows Mail
c) set “NoSplash”=dword:00000001
d) exit and restart
Delete Hibernate File
When you use hibernate in Windows Vista, it creates a file called hiberfil.sys. This file can grow rather large and you may want to remove it. A simple way to delete it:
a) log on as the Administrator
b) start Command Prompt then type: powercfg -h off
c) hit enter
Turn on File Extensions
a) go to any folder, e.g. Documents
b) Layout > Show Classic Menus
c) Tools > Folder Options > View Tab
d) Untick “Hide Extensions of Known File Types”
e) close, return to Layout and put it back as it was
Enable Sidebar in Windows Vista
a) go to Program Files/Windows Sidebar/sidebar.exe
Start Windows Explorer at a C:\ Drive Instead of Documents
a) create a shortcut to Explorer.exe on your desktop
b) right click on the shortcut and choose ‘Properties’ and click on the ‘Shortcut’ tab
c) you will see the default ‘%SystemRoot%\explorer.exe’ in the ‘Target:’ field
d) change the value to: C:\WINDOWS\explorer.exe /n, /e, c:\
e) click OK and exit
Getting Rid of Arrows on Shortcuts
a) start > run = “regedit”
b) HKEY_CLASSES_ROOT > lnkfile
c) rename ‘IsShortcut’ to ‘AriochIsShortcut’ in the right pane
d) close regedit and reboot
Show Administrator on Welcome Screen
a) start > run = “control userpasswords2″
b) select administrator account, click reset password (input new pass) and hit “Ok”
c) start > run = “regedit”
d) HKEY_LOCAL_MACHINE > SOFTWARE > Microsoft > Windows NT > CurrentVersion > Winlogon > SpecialAccounts > UserList
e) create “DWORD (32bit) Value” with Value Name: Administrator and Value Data: 1
Disable User Access Control (UAC)
a) while logged in with admin rights
b) press the key combo Win+R (the “Run command” box comes up)
c) run “msconfig”
d) go to the “Tools” tab
e) scroll down to “disable UAC” and click the “launch” button below
f) it will execute a command & leave behind a CMD window, exit that, reboot Vista
Enabling Additional Avalon Effects
Once you have Aero turned on, you can enable additional transition effects. Follow the steps below to add some additional desktop and explorer effects:
a) open regedit.
b) HKEY_Local_Machine > Software > Microsoft > Windows > Current Version > Explorer
c) create a new DWORD and call it MILDesktop.
d) set the value of MILDesktop to 1
e) create a new DWORD and call it MILExplorer
f) set the value of MILExplorer to 1
g) exit and restart
Top Secrets ( hidden ) Of Vista
Top hidden secret
vista tips
These are some uncommon but very useful tips tricks & hacks for windows vista to enhance the user experience in windows vista.
Enable Auto-Logon in Windows Vista (Warning: Security Risk)
a) click Start and type ‘netplwiz’ or click that name on the Start menu
b) in the GUI window that comes up, uncheck the “Users must enter a username and password to use this computer” box
c) click ‘Apply’
d) in the new dialog box that opens type the name of the account you want to auto-logon by default (if the account is not normally passworded then it blank)
e) click OK and exit.
Remove ToolTips From Showing When You Mouse Over Something
a) start > run = “regedit”
b) HKEY_CURRENT_USER > Software > Microsoft > Windows > CurrentVersion > Explorer > Advanced
c) set “ShowInfoTip”=dword:00000000
d) exit and reboot
Remove Splash Screen in Windows Mail
a) start > run = “regedit”
b) HKEY_CURRENT_USER > Software > Microsoft > Windows Mail
c) set “NoSplash”=dword:00000001
d) exit and restart
Delete Hibernate File
When you use hibernate in Windows Vista, it creates a file called hiberfil.sys. This file can grow rather large and you may want to remove it. A simple way to delete it:
a) log on as the Administrator
b) start Command Prompt then type: powercfg -h off
c) hit enter
Turn on File Extensions
a) go to any folder, e.g. Documents
b) Layout > Show Classic Menus
c) Tools > Folder Options > View Tab
d) Untick “Hide Extensions of Known File Types”
e) close, return to Layout and put it back as it was
Enable Sidebar in Windows Vista
a) go to Program Files/Windows Sidebar/sidebar.exe
Start Windows Explorer at a C:\ Drive Instead of Documents
a) create a shortcut to Explorer.exe on your desktop
b) right click on the shortcut and choose ‘Properties’ and click on the ‘Shortcut’ tab
c) you will see the default ‘%SystemRoot%\explorer.exe’ in the ‘Target:’ field
d) change the value to: C:\WINDOWS\explorer.exe /n, /e, c:\
e) click OK and exit
Getting Rid of Arrows on Shortcuts
a) start > run = “regedit”
b) HKEY_CLASSES_ROOT > lnkfile
c) rename ‘IsShortcut’ to ‘AriochIsShortcut’ in the right pane
d) close regedit and reboot
Show Administrator on Welcome Screen
a) start > run = “control userpasswords2″
b) select administrator account, click reset password (input new pass) and hit “Ok”
c) start > run = “regedit”
d) HKEY_LOCAL_MACHINE > SOFTWARE > Microsoft > Windows NT > CurrentVersion > Winlogon > SpecialAccounts > UserList
e) create “DWORD (32bit) Value” with Value Name: Administrator and Value Data: 1
Disable User Access Control (UAC)
a) while logged in with admin rights
b) press the key combo Win+R (the “Run command” box comes up)
c) run “msconfig”
d) go to the “Tools” tab
e) scroll down to “disable UAC” and click the “launch” button below
f) it will execute a command & leave behind a CMD window, exit that, reboot Vista
Enabling Additional Avalon Effects
Once you have Aero turned on, you can enable additional transition effects. Follow the steps below to add some additional desktop and explorer effects:
a) open regedit.
b) HKEY_Local_Machine > Software > Microsoft > Windows > Current Version > Explorer
c) create a new DWORD and call it MILDesktop.
d) set the value of MILDesktop to 1
e) create a new DWORD and call it MILExplorer
f) set the value of MILExplorer to 1
g) exit and restart
0
Ravva Vamsi
BEEP CODES AND DESCRIPTION OF IBM,AMI,PHOENIX
After repeated Requests for beep codes i have decided to post them here maybe they could be pinned
1 short beep System is OK
2 short beeps POST Error - error code shown on screen No beep Power supply or system board problem Continuous beep Power supply, system board, or keyboard problem Repeating short beeps Power supply or system board problem
1 long, 1 short beep System board problem
1 long, 2 short beeps Display adapter problem (MDA, CGA)
1 long, 3 short beeps Display adapter problem (EGA)
3 long beeps 3270 keyboard card
IBM POST Diagnostic Code Descriptions
Code Description
100 - 199 System Board
200 - 299 Memory
300 - 399 Keyboard
400 - 499 Monochrome Display
500 - 599 Colour/Graphics Display
600 - 699 Floppy-disk drive and/or Adapter
700 - 799 Math Coprocessor
900 - 999 Parallel Printer Port
1000 - 1099 Alternate Printer Adapter
1100 - 1299 Asynchronous Communication Device, Adapter, or Port
1300 - 1399 Game Port
1400 - 1499 Colour/Graphics Printer
1500 - 1599 Synchronous Communication Device, Adapter, or Port
1700 - 1799 Hard Drive and/or Adapter
1800 - 1899 Expansion Unit (XT)
2000 - 2199 Bisynchronous Communication Adapter
2400 - 2599 EGA system-board Video (MCA)
3000 - 3199 LAN Adapter
4800 - 4999 Internal Modem
7000 - 7099 Phoenix BIOS Chips
7300 - 7399 3.5" Disk Drive
8900 - 8999 MIDI Adapter
11200 - 11299 SCSI Adapter
21000 - 21099 SCSI Fixed Disk and Controller
21500 - 21599 SCSI CD-ROM System
1 Short Beep System OK
2 Short Beeps Parity error in the first 64 KB of memory
3 Short Beeps Memory failure in the first 64 KB
4 Short Beeps Memory failure in the first 64 KB Operational of memory
or Timer 1 on the motherboard is not functioning
5 Short Beeps The CPU on the motherboard generated an error
6 Short Beeps The keyboard controller may be bad. The BIOS cannot switch to protected mode
7 Short Beeps The CPU generated an exception interrupt
8 Short Beeps The system video adapter is either missing, or its memory is faulty
9 Short Beeps The ROM checksum value does not match the value encoded in the BIOS
10 Short Beeps The shutdown register for CMOS RAM failed
11 Short Beeps The external cache is faulty
1 Long, 3 Short Beeps Memory Problems
1 Long, 8 Short Beeps Video Card Problems
Code Description
1-1-3 CMOS read/write failure
1-1-4 ROM BIOS checksum error
1-2-1 Programmable interval timer failure
1-2-2 DMA initialisation failure
1-2-3 DMA page register read/write failure
1-3-1 RAM refresh verification failure
1-3-3 First 64k RAM chip or data line failure
1-3-4 First 64k RAM odd/even logic failure
1-4-1 Address line failure first 64k RAM
1-4-2 Parity failure first 64k RAM
2-_-_ Faulty Memory
3-1-_ Faulty Motherboard
3-2-4 Keyboard controller Test failure
3-3-4 Screen initialisation failure
3-4-1 Screen retrace test failure
3-4-2 Search for video ROM in progress
4-2-1 Timer tick interrupt in progress or failure
4-2-2 Shutdown test in progress or failure
4-2-3 Gate A20 failure
4-2-4 Unexpected interrupt in protected mode
4-3-1 RAM test in progress or failure>ffffh
4-3-2 Faulty Motherboard
4-3-3 Interval timer channel 2 test or failure
4-3-4 Time of Day clock test failure
4-4-1 Serial port test or failure
4-4-2 Parallel port test or failure
4-4-3 Math coprocessor test or failure
Low 1-1-2 System Board select failure
Low 1-1-3 Extended CMOS RAM failure
Standard Original IBM POST Error Codes
Code : Description
1 short beep System is OK
2 short beeps POST Error - error code shown on screen No beep Power supply or system board problem Continuous beep Power supply, system board, or keyboard problem Repeating short beeps Power supply or system board problem
1 long, 1 short beep System board problem
1 long, 2 short beeps Display adapter problem (MDA, CGA)
1 long, 3 short beeps Display adapter problem (EGA)
3 long beeps 3270 keyboard card
IBM POST Diagnostic Code Descriptions
Code Description
100 - 199 System Board
200 - 299 Memory
300 - 399 Keyboard
400 - 499 Monochrome Display
500 - 599 Colour/Graphics Display
600 - 699 Floppy-disk drive and/or Adapter
700 - 799 Math Coprocessor
900 - 999 Parallel Printer Port
1000 - 1099 Alternate Printer Adapter
1100 - 1299 Asynchronous Communication Device, Adapter, or Port
1300 - 1399 Game Port
1400 - 1499 Colour/Graphics Printer
1500 - 1599 Synchronous Communication Device, Adapter, or Port
1700 - 1799 Hard Drive and/or Adapter
1800 - 1899 Expansion Unit (XT)
2000 - 2199 Bisynchronous Communication Adapter
2400 - 2599 EGA system-board Video (MCA)
3000 - 3199 LAN Adapter
4800 - 4999 Internal Modem
7000 - 7099 Phoenix BIOS Chips
7300 - 7399 3.5" Disk Drive
8900 - 8999 MIDI Adapter
11200 - 11299 SCSI Adapter
21000 - 21099 SCSI Fixed Disk and Controller
21500 - 21599 SCSI CD-ROM System
AMI BIOS Beep Codes
Code : Description
1 Short Beep System OK
2 Short Beeps Parity error in the first 64 KB of memory
3 Short Beeps Memory failure in the first 64 KB
4 Short Beeps Memory failure in the first 64 KB Operational of memory
or Timer 1 on the motherboard is not functioning
5 Short Beeps The CPU on the motherboard generated an error
6 Short Beeps The keyboard controller may be bad. The BIOS cannot switch to protected mode
7 Short Beeps The CPU generated an exception interrupt
8 Short Beeps The system video adapter is either missing, or its memory is faulty
9 Short Beeps The ROM checksum value does not match the value encoded in the BIOS
10 Short Beeps The shutdown register for CMOS RAM failed
11 Short Beeps The external cache is faulty
1 Long, 3 Short Beeps Memory Problems
1 Long, 8 Short Beeps Video Card Problems
Phoenix BIOS Beep Codes
Note - Phoenix BIOS emits three sets of beeps, separated by a brief pause.
Code Description
1-1-3 CMOS read/write failure
1-1-4 ROM BIOS checksum error
1-2-1 Programmable interval timer failure
1-2-2 DMA initialisation failure
1-2-3 DMA page register read/write failure
1-3-1 RAM refresh verification failure
1-3-3 First 64k RAM chip or data line failure
1-3-4 First 64k RAM odd/even logic failure
1-4-1 Address line failure first 64k RAM
1-4-2 Parity failure first 64k RAM
2-_-_ Faulty Memory
3-1-_ Faulty Motherboard
3-2-4 Keyboard controller Test failure
3-3-4 Screen initialisation failure
3-4-1 Screen retrace test failure
3-4-2 Search for video ROM in progress
4-2-1 Timer tick interrupt in progress or failure
4-2-2 Shutdown test in progress or failure
4-2-3 Gate A20 failure
4-2-4 Unexpected interrupt in protected mode
4-3-1 RAM test in progress or failure>ffffh
4-3-2 Faulty Motherboard
4-3-3 Interval timer channel 2 test or failure
4-3-4 Time of Day clock test failure
4-4-1 Serial port test or failure
4-4-2 Parallel port test or failure
4-4-3 Math coprocessor test or failure
Low 1-1-2 System Board select failure
Low 1-1-3 Extended CMOS RAM failure
1
Ravva Vamsi
How to Install Windows 7 From USB Drive
 |
| Install windows7 from usb drive |
In this tutorial I will show you how to install Windows 7 from USB drive. Before follow this tutorial, make sure you have following things:
- At least 4GB USB flash drive
- Windows 7 installation DVD
- WinToFlash software.
- Some Skills!

You got all, so continue...


Why do I use this software, because it's very easy to use and simple (no installation require). WinToFlashsoftware will help you to install windows from flash. something else need you check in your computer is your PC support boot-up from USB drive or not. you can see this option in computer BIOS. (Martik BIOS Info)


Installing windows 7 from USB drive have some advantages are you don't need to worry if the DVD drive cannot read the disc if there is any scratches on the Windows 7 installation DVD, it is more convenient to carry around your USB flash drive rather than a DVD disc, you still able to install Windows 7 although the PC doesn't even have a CD/DVD drive.
Creating Windows 7 installation USB drive
                                - There is a software called WinToFlash that does everything above automatically. All you need to do is run the program, set the location of the Windows 7 installation disc and the destination of your USB flash drive.
- Download WinToFlash software. (I recommend to use the latst version.)
- Extract download file and then go to extracted folder. run "WinToFlash.exe" then Click the “big check button” to start Windows setup transfer wizard.
- Click Next then Specify the locations of Windows 7 installation DVD and USB drive then click Next (The Windows 7 instalation DVD is the drive letter of your Windows 7 DVD drive and the USB drive is the drive letter of your USB flash drive)
- Select “I Accepted the terms of the license agreement” and click Continue.
- Click OK to start formatting your USB flash drive and the files will be automatically transferred from Windows 7 installations DVD to USB flash drive.
- Click Next when finished copying.
Testing your system for USB boot compatibility
The following tutorial will enable a user to check if a computer system can boot from a USB device and ultimately help determine if the computer can boot a Linux version from USB. In most cases if the test is successful, you should have no problem running Linux portably. In addition to testing your PC for USB Linux boot capability, the "Memtest86+" system memory diagnostics program that is included, allows the user to scan their system memory for errors by simply booting memtest from a USB device or flash drive.
Basic USB Boot Test Essentials:
- Windows PC to perform the install - USB flash device
- USB-Boot-Tester.exe (includes Memtest86+ and Syslinux)
Installing Memtest on USB to test for USB Boot compatibility: The following explains how to install Memtest on a USB device and further run Memtest from USB. Enabling us to test whether a system can boot from USB.
- Download (159 KB) and run USB Boot Tester and follow the onscreen instructions
- Reboot your computer and set your system BIOS to boot from USB-ZIP or USB-HDD. Or, set the hard disk boot priority to boot from the USB stick if your BIOS lists the device as a hard drive
- Save your BIOS settings and reboot.
Upon reboot, you should have a successful launch of Memtest from the USB flash drive:
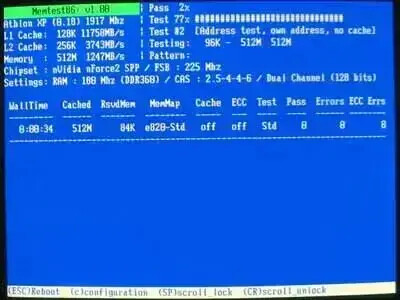
Install Windows 7 From USB Drive
This test concludes that your system is capable of booting from a USB device using Syslinux and it should be possible to run Linux from USB.
Notes: After booting Memtest from USB, it is not necessary to complete the system memory test. However, if you have the time, it can't hurt to ensure that your computers memory is in good shape.


This test does not guarantee that your computers hardware is supported with a particular Linux distribution. It is possible to pass this test and still have problems booting Linux. For example: A Video Card driver may not be available by default with a particular Linux distribution which could leave you at the shell after boot.
How to Install Windows 7 from USB drive
Boot up the computer from USB flash drive. You will need to go into BIOS setup and set to boot from flash devices (USB device). If you got it right, the Windows 7 installation should load from your USB flash drive and install the Windows 7 like installing windows 7 from DVD drive.
0
Ravva Vamsi
 Google secrets
--------------------------------------------------------------------------------
Method 1:-
voila!
Method 2:-
Google Secrets

--------------------------------------------------------------------------------
Method 1:-
Put Following string in google search:
?intitle:index.of? mp3
You only need add the name of the song/artist/singer.
Example: ?intitle:index.of? mp3 jackson
voila!
Method 2:-
put Following strings in google search:
"parent directory " /appz/ -xxx -html -htm -php -shtml -opendivx -md5 -md5sums
"parent directory " DVDRip -xxx -html -htm -php -shtml -opendivx -md5 -md5sums
"parent directory "Xvid -xxx -html -htm -php -shtml -opendivx -md5 -md5sums
"parent directory " Gamez -xxx -html -htm -php -shtml -opendivx -md5 -md5sums
"parent directory " MP3 -xxx -html -htm -php -shtml -opendivx -md5 -md5sums
"parent directory " Name of Singer or album -xxx -html -htm -php -shtml -opendivx -md5 -md5sums
Notice that i am only changing the word after the parent directory, and use name of the file in place of "XXX" change it to what you want and you will get a lot of stuff.
0
Ravva Vamsi
 Windows Shortcuts - The Best Short Cuts Ever !!!
Internetbrowser
If you have a Microsoft Natural Keyboard, or any other compatible keyboard that includes the Windows logo key and the Application key , you can use these keyboard shortcuts:
Windows Shortcuts - Best Short Cuts Ever !!!
 Windows Shortcuts - The Best Short Cuts Ever !!!
The Best Collection - I made Presenting 4 u Enjoy !!!
Getting used to using your keyboard exclusively and leaving your mouse behind will make you much more efficient at performing any task on any Windows system. I use the following keyboard shortcuts every day:
Windows key + R = Run menu
This is usually followed by:
cmd = Command Prompt
iexplore + "web address" = Internet Explorer
compmgmt.msc = Computer Management
dhcpmgmt.msc = DHCP Management
dnsmgmt.msc = DNS Management
services.msc = Services
eventvwr = Event Viewer
dsa.msc = Active Directory Users and Computers
dssite.msc = Active Directory Sites and Services
Windows key + E = Explorer
ALT + Tab = Switch between windows
ALT, Space, X = Maximize window
CTRL + Shift + Esc = Task Manager
Windows key + Break = System properties
Windows key + F = Search
Windows key + D = Hide/Display all windows
CTRL + C = copy
CTRL + X = cut
CTRL + V = paste
Also don't forget about the "Right-click" key next to the right Windows key on your keyboard. Using the arrows and that key can get just about anything done once you've opened up any program.
Keyboard Shortcuts
[Alt] and [Esc] Switch between running applications
[Alt] and letter Select menu item by underlined letter
[Ctrl] and [Esc] Open Program Menu
[Ctrl] and [F4] Close active document or group windows (does not work with some applications)
[Alt] and [F4] Quit active application or close current window
[Alt] and [-] Open Control menu for active document
Ctrl] Lft., Rt. arrow Move cursor forward or back one word
Ctrl] Up, Down arrow Move cursor forward or back one paragraph
[F1] Open Help for active application
Windows+M Minimize all open windows
Shift+Windows+M Undo minimize all open windows
Windows+F1 Open Windows Help
Windows+Tab Cycle through the Taskbar buttons
Windows+Break Open the System Properties dialog box
Acessability shortcuts
Right SHIFT for eight seconds........ Switch FilterKeys on and off.
Left ALT +left SHIFT +PRINT SCREEN....... Switch High Contrast on and off.
Left ALT +left SHIFT +NUM LOCK....... Switch MouseKeys on and off.
SHIFT....... five times Switch StickyKeys on and off.
NUM LOCK...... for five seconds Switch ToggleKeys on and off.
Explorer shortcuts
END....... Display the bottom of the active window.
HOME....... Display the top of the active window.
NUM LOCK+ASTERISK....... on numeric keypad (*) Display all subfolders under the selected folder.
NUM LOCK+PLUS SIGN....... on numeric keypad (+) Display the contents of the selected folder.
NUM LOCK+MINUS SIGN....... on numeric keypad (-) Collapse the selected folder.
LEFT ARROW...... Collapse current selection if it's expanded, or select parent folder.
RIGHT ARROW....... Display current selection if it's collapsed, or select first subfolder.
Type the following commands in your Run Box (Windows Key + R) or Start Run
devmgmt.msc = Device Manager
msinfo32 = System Information
cleanmgr = Disk Cleanup
ntbackup = Backup or Restore Wizard (Windows Backup Utility)
mmc = Microsoft Management Console
excel = Microsoft Excel (If Installed)
msaccess = Microsoft Access (If Installed)
powerpnt = Microsoft PowerPoint (If Installed)
winword = Microsoft Word (If Installed)
frontpg = Microsoft FrontPage (If Installed)
notepad = Notepad
wordpad = WordPad
calc = Calculator
msmsgs = Windows Messenger
mspaint = Microsoft Paint
wmplayer = Windows Media Player
rstrui = System Restore
netscp6 = Netscape 6.x
netscp = Netscape 7.x
netscape = Netscape 4.x
waol = America Online
control = Opens the Control Panel
control printers = Opens the Printers Dialog
type in u're adress "google", then press [Right CTRL] and [Enter]
add www. and .com to word and go to it
For Windows XP:
Copy. CTRL+C
Cut. CTRL+X
Paste. CTRL+V
Undo. CTRL+Z
Delete. DELETE
Delete selected item permanently without placing the item in the Recycle Bin. SHIFT+DELETE
Copy selected item. CTRL while dragging an item
Create shortcut to selected item. CTRL+SHIFT while dragging an item
Rename selected item. F2
Move the insertion point to the beginning of the next word. CTRL+RIGHT ARROW
Move the insertion point to the beginning of the previous word. CTRL+LEFT ARROW
Move the insertion point to the beginning of the next paragraph. CTRL+DOWN ARROW
Move the insertion point to the beginning of the previous paragraph. CTRL+UP ARROW
Highlight a block of text. CTRL+SHIFT with any of the arrow keys
Select more than one item in a window or on the desktop, or select text within a document. SHIFT with any of the arrow keys
Select all. CTRL+A
Search for a file or folder. F3
View properties for the selected item. ALT+ENTER
Close the active item, or quit the active program. ALT+F4
Opens the shortcut menu for the active window. ALT+SPACEBAR
Close the active document in programs that allow you to have multiple documents open simultaneously. CTRL+F4
Switch between open items. ALT+TAB
Cycle through items in the order they were opened. ALT+ESC
Cycle through screen elements in a window or on the desktop. F6
Display the Address bar list in My Computer or Windows Explorer. F4
Display the shortcut menu for the selected item. SHIFT+F10
Display the System menu for the active window. ALT+SPACEBAR
Display the Start menu. CTRL+ESC
Display the corresponding menu. ALT+Underlined letter in a menu name
Carry out the corresponding command. Underlined letter in a command name on an open menu
Activate the menu bar in the active program. F10
Open the next menu to the right, or open a submenu. RIGHT ARROW
Open the next menu to the left, or close a submenu. LEFT ARROW
Refresh the active window. F5
View the folder one level up in My Computer or Windows Explorer. BACKSPACE
Cancel the current task. ESC
SHIFT when you insert a CD into the CD-ROM drive Prevent the CD from automatically playing.
Use these keyboard shortcuts for dialog boxes:
To Press
Move forward through tabs. CTRL+TAB
Move backward through tabs. CTRL+SHIFT+TAB
Move forward through options. TAB
Move backward through options. SHIFT+TAB
Carry out the corresponding command or select the corresponding option. ALT+Underlined letter
Carry out the command for the active option or button. ENTER
Select or clear the check box if the active option is a check box. SPACEBAR
Select a button if the active option is a group of option buttons. Arrow keys
Display Help. F1
Display the items in the active list. F4
Open a folder one level up if a folder is selected in the Save As or Open dialog box. BACKSPACE
Display or hide the Start menu. WIN Key
Display the System Properties dialog box. WIN Key+BREAK
Show the desktop. WIN Key+D
Minimize all windows. WIN Key+M
Restores minimized windows. WIN Key+Shift+M
Open My Computer. WIN Key+E
Search for a file or folder. WIN Key+F
Search for computers. CTRL+WIN Key+F
Display Windows Help. WIN Key+F1
Lock your computer if you are connected to a network domain, or switch users if you are not connected to a network domain. WIN Key+ L
Open the Run dialog box. WIN Key+R
Open Utility Manager. WIN Key+U
Accessibility keyboard shortcuts:
Switch FilterKeys on and off. Right SHIFT for eight seconds
Switch High Contrast on and off. Left ALT+left SHIFT+PRINT SCREEN
Switch MouseKeys on and off. Left ALT +left SHIFT +NUM LOCK
Switch StickyKeys on and off. SHIFT five times
Switch ToggleKeys on and off. NUM LOCK for five seconds
Open Utility Manager. WIN Key+U
Shortcuts you can use with Windows Explorer:
Display the bottom of the active window. END
Display the top of the active window. HOME
Display all subfolders under the selected folder. NUM LOCK+ASTERISK on numeric keypad (*)
Display the contents of the selected folder. NUM LOCK+PLUS SIGN on numeric keypad (+)
Collapse the selected folder. NUM LOCK+MINUS SIGN on numeric keypad (-)
Collapse current selection if it's expanded, or select parent folder. LEFT ARROW
Display current selection if it's collapsed, or select first subfolder. RIGHT ARROW
Don't Forgot To Give Comments, Before U Copying the Shortcuts !!!
3
Ravva Vamsi

What To Do When Windows Password Forgotten or Hacked !!!
How to Hack/Reset Windows Administrator Password:-
If your a Computer Administrator and your Admin Password is Hacked by one of your Users or If you Forgot Password, then there is small trick to reset your Admin Password , However this trick also works to change Non-Administrator Accounts
NOTE:- This Trick given for Education Purpose Only , Don't Misuse this trick
So in this way you can reset the password of any Windows account at times when you forget it so that you need not re-install your OS for any reason. I hope this helps.
NOTE:- This Trick given for Education Purpose Only , Don't Misuse this trick , We are Not Responsible For Any Consequences
I am Waiting For Your Response!!!
-Posted by UandiStar.org
What To Do When Windows Password Forgotten or Hacked !!!

What To Do When Windows Password Forgotten or Hacked !!!
How to Hack/Reset Windows Administrator Password:-
If your a Computer Administrator and your Admin Password is Hacked by one of your Users or If you Forgot Password, then there is small trick to reset your Admin Password , However this trick also works to change Non-Administrator Accounts
NOTE:- This Trick given for Education Purpose Only , Don't Misuse this trick
simple way to reset Non-Administrator and Administrator account passwords:-
step-by-step instruction to accomplish this task:-
1. Open the command prompt (Start->Run->type cmd->Enter)
2. Now type net user and hit Enter
3. Now the system will show you a list of user accounts on the computer. Say for example you need to reset the password of the account by name UandiStar, then do as follows
4. Type net user UandiStar<space>password and hit Enter. Now the system will ask you to enter the new password for the account. That’s it. Now you’ve successfully reset the password for John without knowing his old password.
!!!!! This Trick May/May not works for Win7 but works Sure in all Other Version of Windows!!!!
I am giving Another Trick which works Sure to reset Windows administrator password (for Win 2000, XP, Vista and Win 7)
Here is an excellent hack using which you can reset the password or make the password empty (remove the password) so that you can gain administrator access to the computer. You can do this with a small tool called Offline NT Password & Registry Editor. This utility works offline, that means you need to shut down your computer and boot off your using a floppy disk, CD or USB device (such as pen drive). The tool has the following features.
- You do not need to know the old password to set a new one
- Will detect and offer to unlock locked or disabled out user accounts!
- There is also a registry editor and other registry utilities that works under linux/unix, and can be used for other things than password editing.
NOTE:- This Trick given for Education Purpose Only , Don't Misuse this trick , We are Not Responsible For Any Consequences
I am Waiting For Your Response!!!
-Posted by UandiStar.org
Subscribe to:
Posts (Atom)


